FIELD MANUAL // 02
Your Turn
Deploy, attack, occupy, and reinforce — the four phases of a turn
This chapter walks one full turn: what you see before you start, the four phases (deploy, attack, occupy, reinforce), and how commits work so you never fire one by accident.
Start of your turn
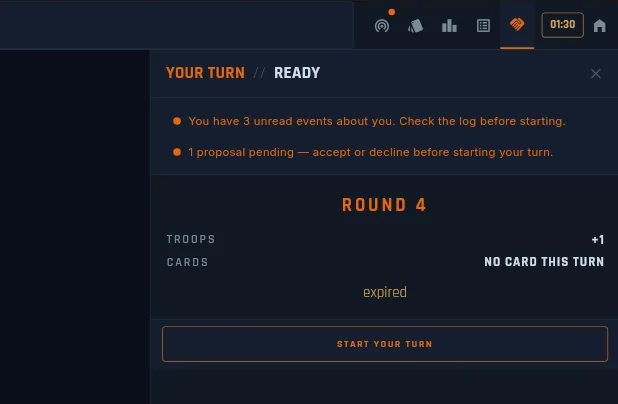
Before you commit to anything, the Start of Your Turn panel tells you what you’re about to walk into, and lets you clear anything that needs clearing first.
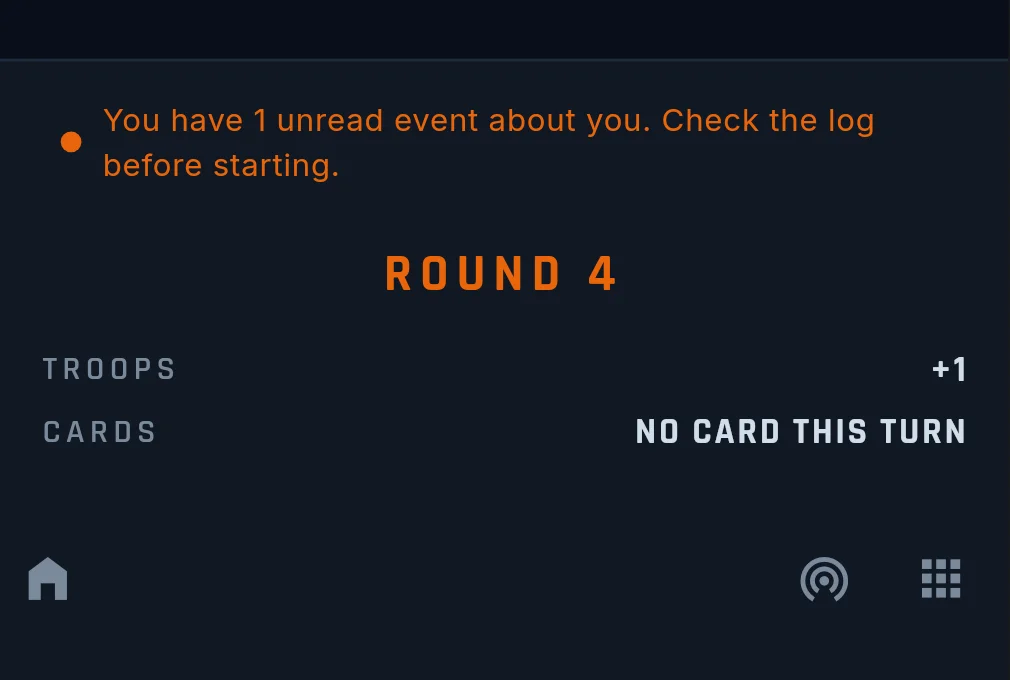
The panel opens with a ROUND N header — your “where in the game am I?” anchor. Under it, two forecast lines read live off your position:
- TROOPS [+N] — the deploy you’ll receive the moment you tap
START YOUR TURN. The number already includes your base deploy, every bonus you hold (including partial payouts), objective income, and any active boosts or penalties. No mental math needed. - CARDS — whether a card is coming this turn. When you’re one tick short, it says so. When nothing is coming, it says that plainly too.
If the lobby set a turn timer, the countdown sits below the forecast.
Above the forecast, up to two orange alert banners stack in a fixed order:
- Unread events. Things that happened to you between turns — messages, combat on your borders, proposals. Tap it to read them all in one place.
- Pending proposal. Someone’s offer is waiting on you. Tap it to jump to your hand, where Accept and Decline sit ready.
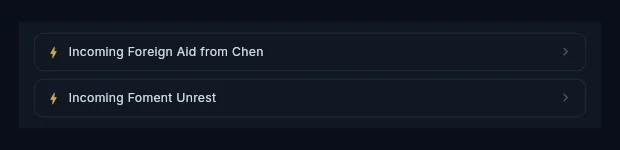
A third reminder appears whenever timed effects are still counting down — unrest about to land, a penalty with turns remaining, fresh intel results. It stacks with the others and updates as effects resolve. See Cards.
Once you tap START YOUR TURN, a thin orange strip lights up under
the header for the rest of your turn. No strip means “not started
yet”; strip means “you’re mid-turn”. And START YOUR TURN is the only
button here that fires on a plain tap — every other commit in the turn
uses hold-to-fire, so a stray finger can’t
end your turn or spend troops you didn’t mean to spend.
Turn structure
Each turn runs a fixed sequence: deploy, attack, occupy, reinforce. Before any of it, the game resolves your turn start on its own — cards earned, penalties applied, agreements taking effect. By the time the panel appears, all of that is done; the banners are how you catch up on it.
After reinforce, your turn ends and the next player’s begins. Between turns you can still play cards, up to the play limits.
Waiting for your turn
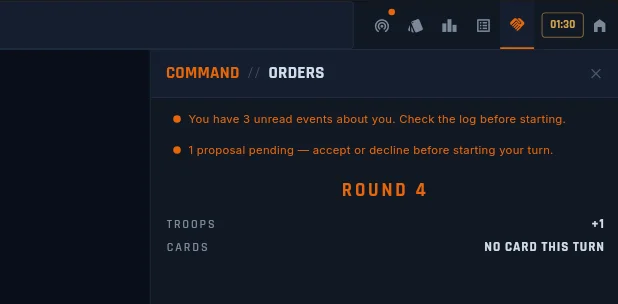
While another player acts, you don’t get a dead screen. The orders panel on desktop (and the phone bottom bar, which opens by itself between turns) carries the same brief you see at your turn start: the round number, your projected troops and cards, and the same two alert banners, tappable straight into the event log or your hand.
No countdown runs while you wait. The clock belongs to the active player; yours starts when your turn does.
Deploy
You receive troops at the start of your turn and place them on territories you own — split them across as many territories as you like.
- The floor. You always get at least 3 troops per turn, even with fewer than 3 territories. Hosts can set the floor anywhere from 1 to 10 in custom games.
- Bonus zones stack extra troops on top. Some pay only when you hold the whole zone, some once you hold enough of it, and some pay per territory from the first one — see Winning.
- Negative zones charge instead of paying. They show in bold red everywhere so you can read the risk before you commit — see Tactical Cards.
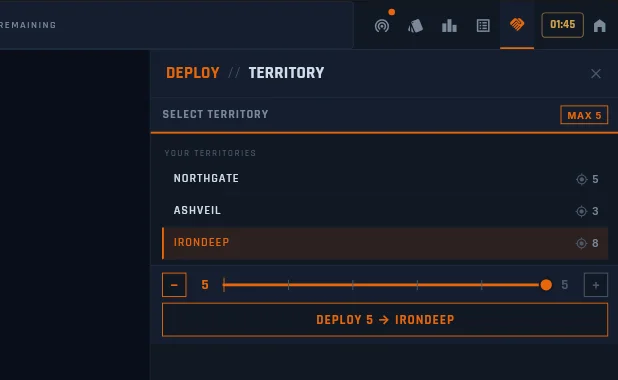
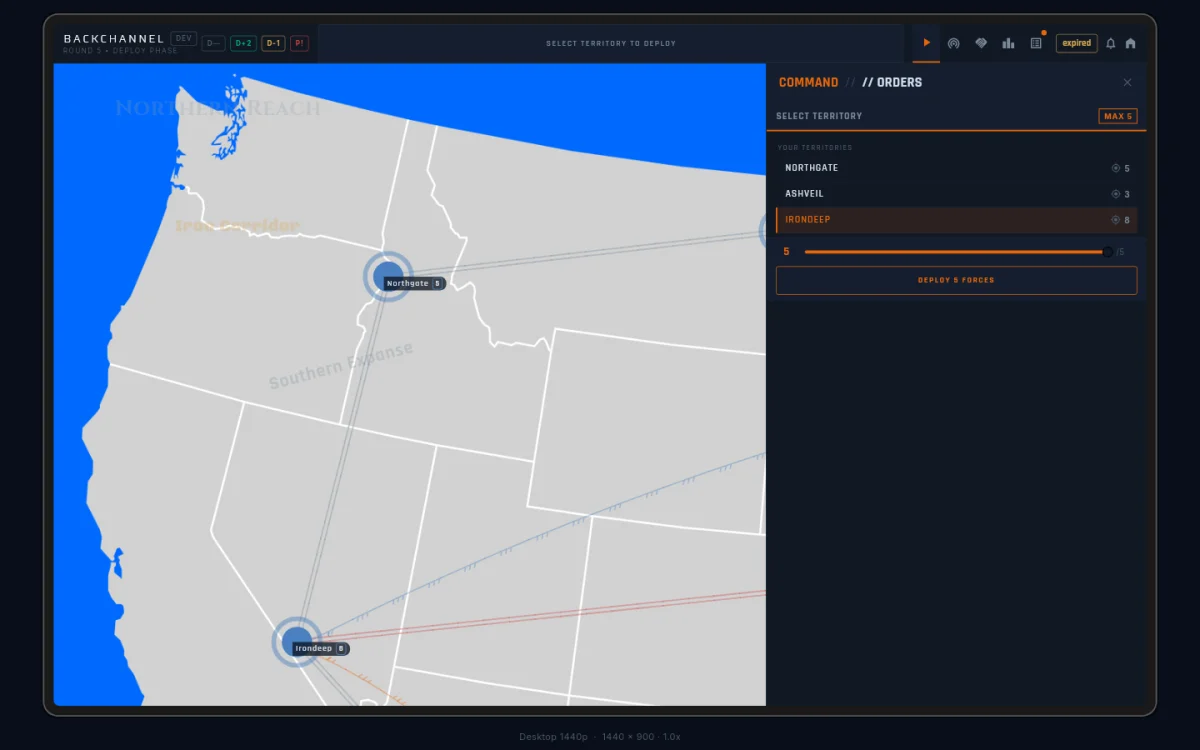
Picking a destination opens the action slider:
[−] n (──bar──) m [+]
The minus and plus keys nudge by 1. The left number is what you’re
committing; the right number is your whole pool. The commit button
under it names the action and the target — a 13-troop deploy onto
Texas reads DEPLOY 13 → TEXAS.
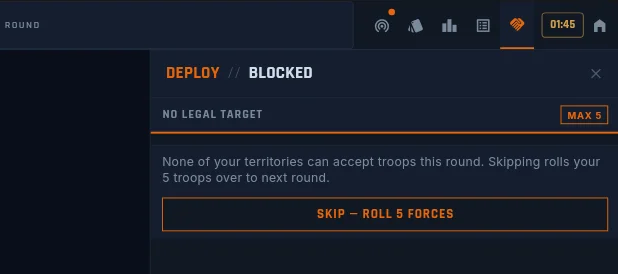
Rarely, every territory you own refuses troops — all of them
fortified,
besieged, or full. The game doesn’t strand you: the slider is replaced
by one button reading SKIP — ROLL N FORCES. Skip, and those troops
arrive next round on top of your normal deploy.
Attack
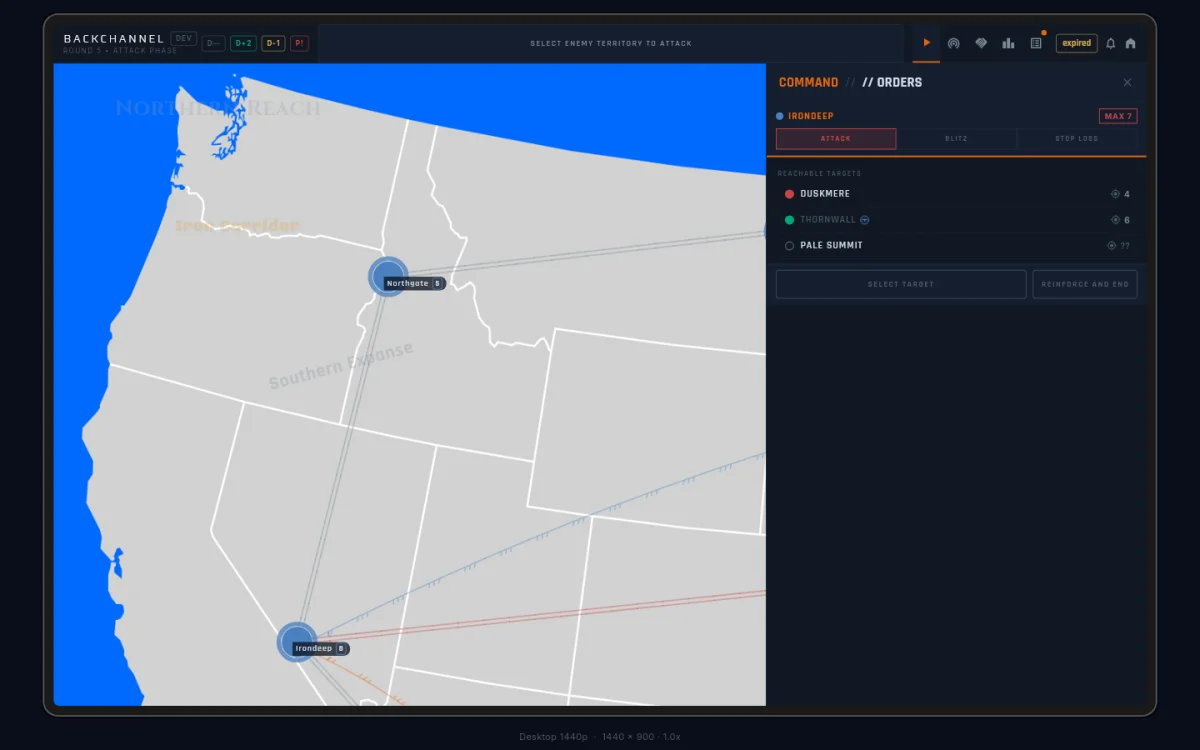
Pick an enemy territory next to one of yours. Combat is dice — both sides roll, losses land per roll. You can attack as often as you like in one turn: different territories, the same target again, anywhere along your border.
Once you’ve picked a source and target, the header shows the RISK% chip — your chance of losing this fight, coloured green through red. The RISK % attack mode below works on the same number. The chip and its colour steps are covered in Tactical Cards.
Three attack modes
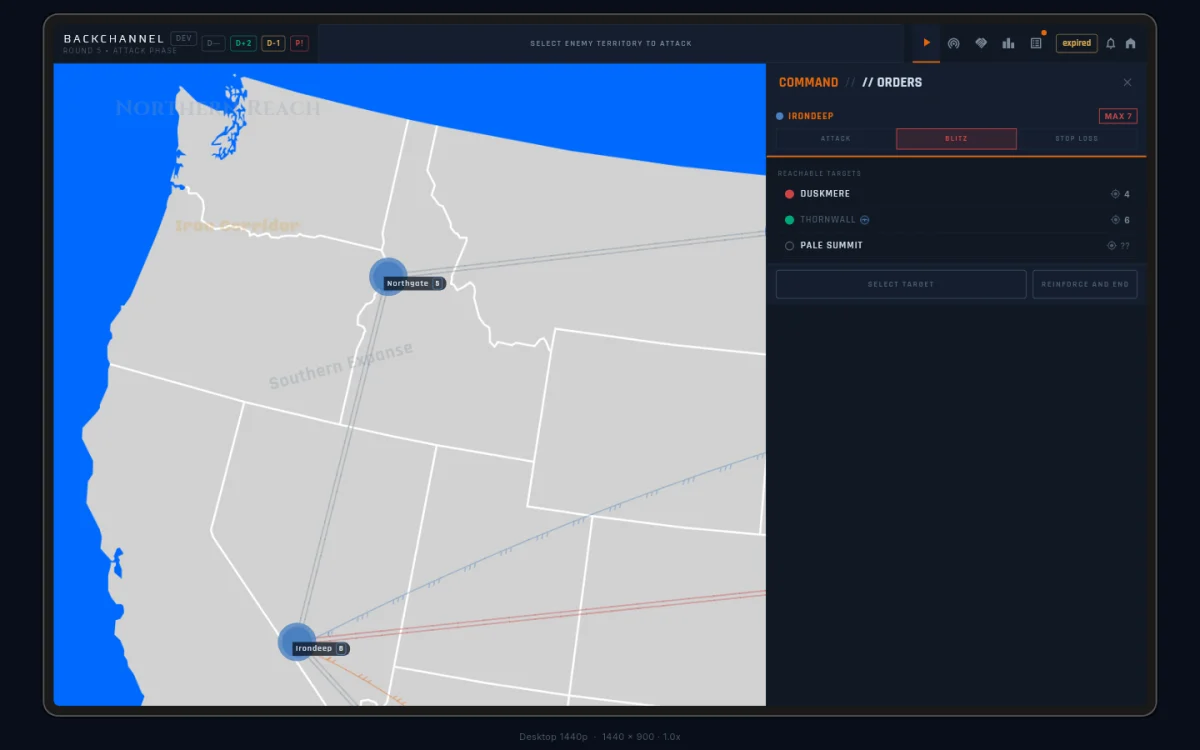
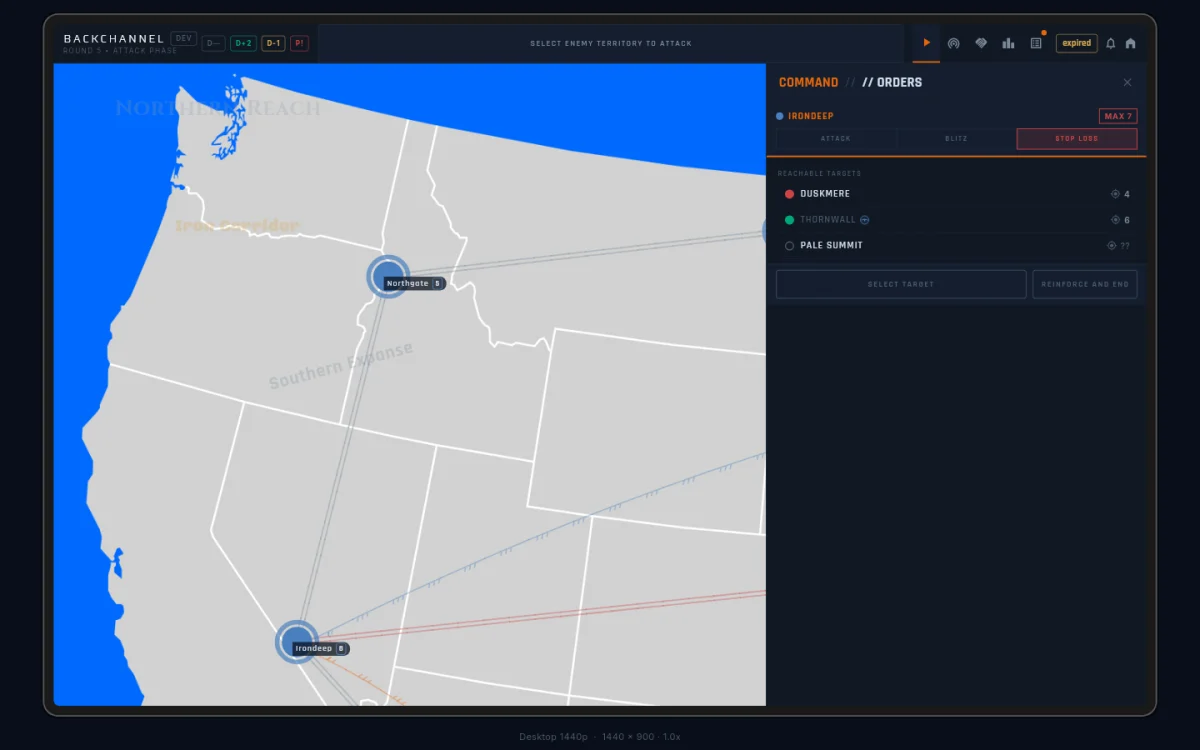
A three-way toggle (ATTACK / BLITZ / RISK %) sits below the source and target:
- ATTACK (the default) rolls one exchange of dice per press. You
lose at most one troop per press, and nothing keeps rolling. Precise
and low-risk: good for probing a defence or chipping at a border.
The commit reads
STRIKE → TARGET. - BLITZ keeps rolling until the defender is gone or your committed
troops are spent. A slider sets how many troops you’re throwing in,
from 1 up to one less than the source garrison; it starts two below
the garrison, so you stay off the last-troop edge unless you drag
there yourself. The commit reads
BLITZ N → TARGET. Fast, but a bad streak can cost you the source. - RISK % is blitz with a stop-loss: you set the risk you’ll
accept, and the attack halts on its own if the live odds get worse
than that. The commit reads
RISK X% → TARGET. The slider, the cap, and the halt are covered in Tactical Cards.
Your mode choice sticks for the whole game — across targets, turns, even a page refresh. A new game starts back on ATTACK.

Hold-to-fire commits
Every commit that spends troops or ends your turn uses hold-to-fire: press and hold for about half a second. A ring fills around the button as you hold; the action fires when the ring completes. Let go early and the ring rewinds — nothing happens, no penalty for the false start.
This covers every commit in the turn, from a single strike to
END TURN. Only START YOUR TURN fires on a plain tap — starting
your turn is safe.
Occupy
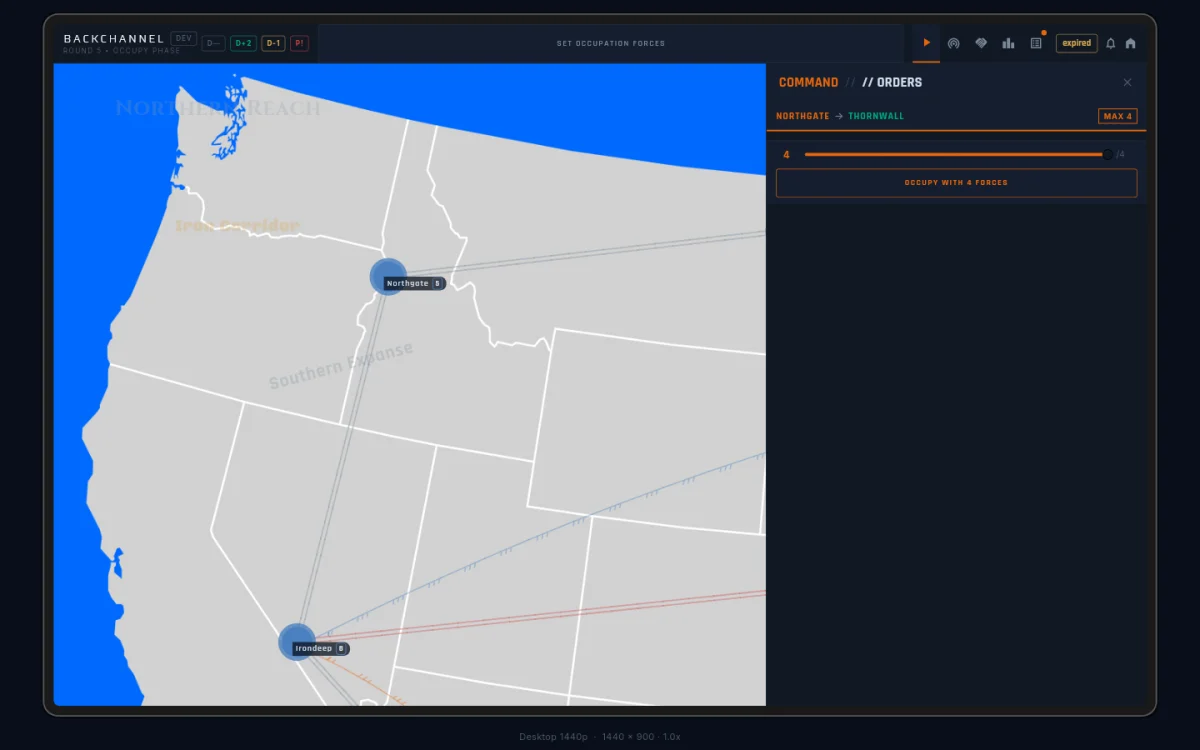
After conquering a territory, you move troops into it. Choose how many
to transfer — both the source and the new territory must keep at least
1 troop each. The commit reads OCCUPY n → TARGET.
Occupying counts immediately: the captured territory adds to your territory count right away, so it feeds this turn’s card ticks.
When you’ve conquered everything in reach (no source has both spare troops and an enemy neighbour), the panel says so plainly: “No remaining valid attacks.” Move on to reinforce.
Reinforce
The last phase moves troops between territories you already own. Pick a source, then a destination — troops find their own way through connected friendly territory.
The phase walks in two steps:
- Pick a source. The header reads
REINFORCE // PICK A SOURCE, and a full-widthPASSbutton sits below if you’d rather skip. - Pick a destination. The panel lists everywhere your troops can
reach. Pick one, and the action slider appears with
MOVE n → DESTandPASSside by side.
The source must keep at least 1 troop. Use reinforce to shore up a
border, stack a defence, or stage next turn’s push. When you’re done,
hold END TURN and the table moves on.